

Expanding your living footprint by remodeling a lower level or constructing a new room addition is one of the most rewarding ways to enhance your home’s value and functionality. However, these new spaces present unique climate control, power, and utility demands that off-the-shelf equipment cannot handle. Learning how to heat and cool a finished basement or home addition requires evaluating your home’s entire mechanical infrastructure—from thermal loads and duct capacity to subpanel circuits and drainage lines. Without a well-calculated climate strategy, newly finished rooms often end up drafty, muggy, or uncomfortably chilly.
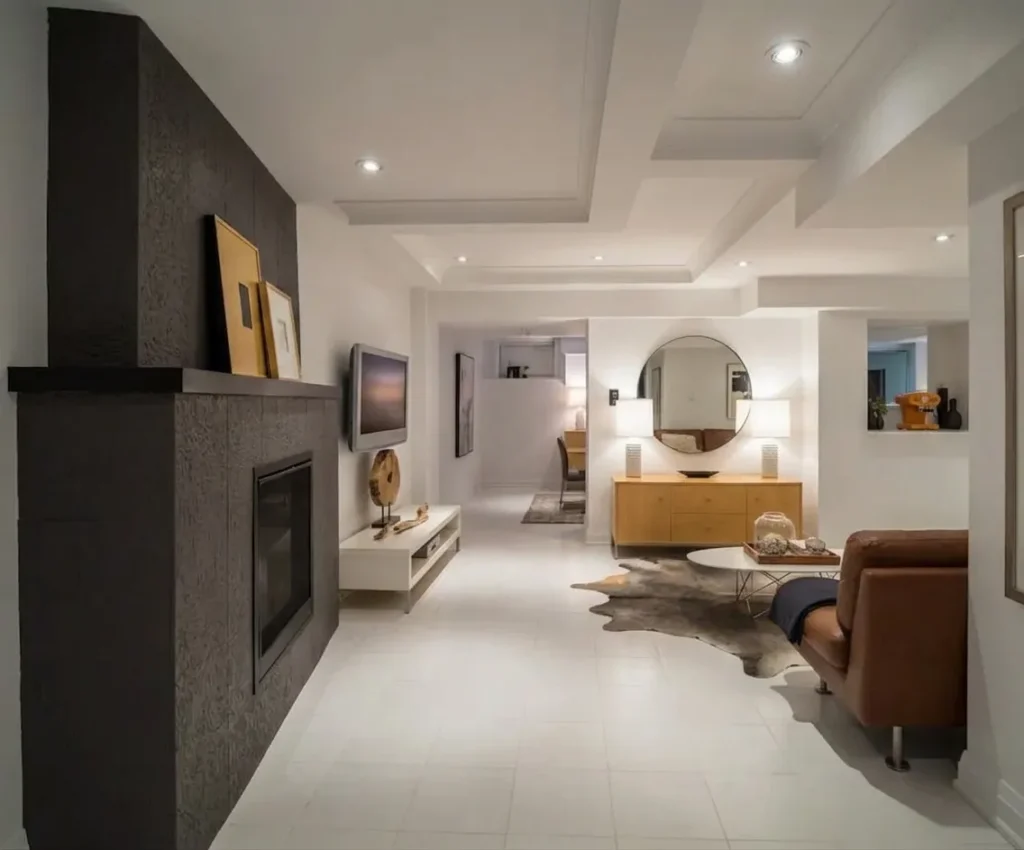
Whether you are building an above-ground sunroom or converting a dark concrete basement into a home theater, this guide breaks down the best technical, electrical, and mechanical solutions for heating and cooling new living zones.
Why Basements and Home Additions Present Climate Challenges
Before selecting heating and cooling equipment, it is important to understand why newly constructed or remodeled spaces behave differently from the rest of your home.
Basements: Subterranean Thermal Dynamics
Basements sit below the frost line. While soil provides natural insulation that keeps lower levels cooler in the summer, concrete foundation walls continuously draw heat away from the room in winter through thermal bridging. Additionally, subterranean air naturally settles, creating thermal stratification where cold air stays trapped at the floor level. Relative humidity is also higher underground, increasing the risk of mold growth if ventilation and moisture control are neglected.
Home Additions: Exposed Exterior Boundaries
Unlike basements, home additions are surrounded on multiple sides—and from above—by outdoor weather conditions. Exterior walls, roof surfaces, and windows expose additions to aggressive thermal gains in summer and heat loss in winter. Furthermore, home additions are located at the extreme end of existing ductwork runs, where static pressure drops and airflow weakens.
The Primary Solutions: How to Heat and Cool a Finished Basement or Addition
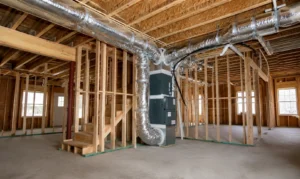
1. Ductless Mini-Split Heat Pumps
For most home additions and finished basements, ductless mini-split heat pumps represent the most efficient and practical solution. A mini-split system consists of an outdoor compressor linked to one or more interior air handlers mounted directly on the wall or ceiling.
- Independent Zone Control: Remodeled areas have distinct heating and cooling needs. Mini-splits use independent thermostats, allowing you to regulate the addition’s temperature without altering the rest of the house.
- Inverter Technology: Modern mini-splits dynamically adjust compressor speed based on exact room demand, avoiding the energy spikes associated with traditional on/off systems.
- Zero Duct Losses: Conventional ductwork can lose up to 20% to 30% of conditioned air through leaks and unconditioned wall cavities. Ductless setups deliver conditioned air directly into the space.
- Year-Round Comfort: Modern cold-climate heat pumps operate efficiently even when outdoor temperatures drop below freezing, providing reliable heating and cooling in a single system.
| DUCTLESS MINI-SPLIT SYSTEM SETUP [ Outdoor Inverter Unit ] <==== Refrigerant & Power Line ====> [ Wall Unit ] |
- High seasonal efficiency (SEER2/HSPF2) • No duct heat loss
- Hyper-heating performance in winter • Independent temperature control
2. Extending Existing Central HVAC Ductwork
Connecting your new space to your main forced-air furnace and central air conditioner is another approach, but it requires careful engineering. Simply cutting a hole into an existing supply trunk and running flex duct to a new room rarely yields comfortable results.
Before extending ductwork, an HVAC professional must perform a Manual J load calculation to evaluate system capacity and static pressure.
- Blower Capacity: Can your existing system move enough cubic feet per minute (CFM) of air to reach the extended boundary?
- Tonnage Capacity: Is your current furnace and air conditioner sized to heat and cool the additional square footage?
- Return Air Lines: Heating and cooling require balanced circulation. If you push supply air into a basement or addition without an adequate return path, the room becomes pressurized, restricting airflow.
If your existing system has excess capacity, adding a motorized zone damper and dedicated thermostat allows the main system to serve the new addition efficiently.
3. Central Heat Pump Systems
If your current furnace or AC is over 12 to 15 years old, extending it to supply a new addition may cause premature equipment failure due to overwork. Replacing an aging unit with a high-efficiency central heat pump allows you to resize the equipment for the expanded footprint. Modern variable-capacity central heat pumps modulate airflow and output, efficiently handling both original zones and newly built living areas.
Evaluating HVAC Options
| Equipment Option | Best Use Case | Primary Advantage | Key Considerations |
| Ductless Mini-Split | Finished basements, bonus rooms, room additions | No ductwork required; zoned efficiency | Requires exterior wall mounting space |
| Extended Existing Ductwork | Small additions adjacent to main trunk | Lower initial cost if HVAC capacity exists | Can strain older equipment; potential static pressure drops |
| Central Heat Pump Upgrade | Renovations with aging primary HVAC | Single integrated unit for entire expanded home | Higher upfront system investment |
| Electric Radiant Floor Heating | Basement bathrooms, tile floors | Elimination of cold-floor syndrome | High operating cost if used as primary heat source |
Critical Electrical Upgrades for Remodeled Spaces
Installing specialized heating and cooling equipment or converting raw square footage into living space places additional demand on your home’s electrical infrastructure.
| ELECTRICAL REQUIREMENTS CHECKLIST [ Main Panel ] ——-> [ 240V Dedicated Circuit ] ——-> [ Mini-Split/Heat Pump] +—————–> [ Subpanel Upgrade ] ———-> [ Basement Outlets/GFCIs ] |
Main Panel Load Calculations & Subpanels
Adding a ductless heat pump, electric auxiliary heater, or multiple new branch circuits requires verifying that your main breaker panel can handle the load. Standard mini-splits typically demand a dedicated 240-volt double-pole circuit.
If your main electrical panel is full or rated at 100 amps, a panel upgrade or subpanel installation may be necessary. Upgrading to a 200-amp service provides the headroom needed for new HVAC equipment, home theater lighting, and dedicated wall outlets.
Electrical Wiring and Code Compliance
Basements and new additions have strict building codes regarding electrical installation.
- GFCI Protection: Ground-Fault Circuit Interrupter (GFCI) protection is required for all basement outlets and exterior additions to prevent shock hazards.
- Dedicated Circuits: High-draw equipment like sump pumps, space-heating units, and window ACs require dedicated branch wiring to prevent circuit trips.
- Rough-in Wiring: Cable paths must be routed through stud centers and protected with nail plates before drywall installation.
When framing walls and running new lines, hiring certified electricians for wiring services ensures all work complies with the National Electrical Code (NEC).
Plumbing Considerations for Additions and Basements
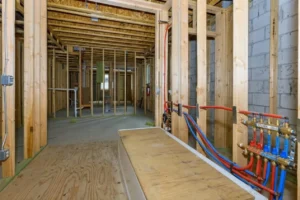
Remodeling projects often include adding bathrooms, wet bars, laundry rooms, or kitchenette areas. Integrating plumbing into basements or additions introduces unique design requirements.
Condensate Drainage
Every air conditioner and heat pump removes moisture from the air during cooling mode. That condensation must be safely drained outdoors or routed to a wastewater stack.
In basements below ground level, gravity drainage is often impossible. Installing a condensate pump routes water upward and out through an exterior wall, preventing basement moisture damage.
Below-Grade Drainage and Ejector Pumps
Adding a bathroom to a finished basement requires moving wastewater up to the main sewer line. Standard gravity plumbing systems may not suffice, requiring an ejector pump or macerating toilet system.
Freeze Protection for Addition Plumbing
Plumbing lines installed in exterior walls of a new addition must be insulated against freezing winter temperatures. Water pipes should run along the warm side of wall insulation, and exterior hose bibbs should feature frost-proof designs.
Comprehensive Moisture and Air Quality Control
Temperature regulation is only half the battle when heating and cooling a finished basement or addition. Indoor air quality and humidity management are equally critical.
Managing Basement Relative Humidity
Basements naturally retain higher humidity. If relative humidity rises above 55%, subterranean spaces become breeding grounds for dust mites and mold. While air conditioners remove moisture during operation, they do not run constantly during mild weather.
Integrating a dedicated whole-home dehumidifier or a ductless mini-split with a dry-mode setting keeps relative humidity between 30% and 50%, protecting drywall, flooring, and air quality.
Air Exchange and Ventilation
Modern building codes require additions and finished basements to maintain adequate outdoor air exchange. Sealed spaces accumulate volatile organic compounds (VOCs) from paint, carpet, and furniture. Installing a Heat Recovery Ventilator (HRV) or Energy Recovery Ventilator (ERV) introduces fresh filtered air into the room while recovering heat energy from the exhausted air.
Step-by-Step Mechanical Checklist for Your Project
To keep your renovation project running smoothly, use this step-by-step installation flow:
1. Perform Load and Sizing Calculations: Complete Manual J Load Analysis.
Have an HVAC professional evaluate square footage, insulation ratings, window orientation, and ceiling heights to determine exact heating and cooling loads (BTUs).
2. Assess Existing Mechanical and Electrical Infrastructure: Verify Capacity Limits.
Inspect your main HVAC unit, main electrical panel amperage, and existing plumbing stack locations to confirm whether expansion or equipment upgrades are required.
3. Select Equipment and Lay Out Duct Runs: Ductless vs. Ducted Configuration.
Decide between a dedicated mini-split heat pump or extended ductwork. Map out line set paths, supply register locations, and return air paths.
4. Complete Rough-In Electrical, Mechanical, and Plumbing: Before Drywall Installation.
Run 240V circuits, branch wiring, copper refrigerant lines, condensate drain paths, and plumbing lines inside wall cavities.
5. Insulate and Air-Seal Exterior Boundaries: Thermal and Vapor Barrier Control.
Apply spray foam or rigid board insulation behind basement framing and across addition studs to prevent thermal loss and condensation buildup.
6.Install Trim, Fixtures, and Perform System Commissioning:Final Performance Testing.
Mount indoor units, finish electrical outlets, connect condensate pumps, charge refrigerant lines, and test airflow balances across all settings.
Preventative Maintenance and Long-Term Care
Once your new space is operational, preventative maintenance preserves equipment efficiency, protects warranties, and ensures consistent air quality.
- Filter Care: Clean or replace filters in ductless mini-splits and furnace returns every 30 to 60 days during heavy usage periods.
- Drain Line Inspections: Clean condensate drain lines annually to prevent blockages and water damage.
- Outdoor Coil Cleaning: Keep mini-split and central heat pump outdoor coils free of leaves, dirt, and debris to maintain heat exchange efficiency.
- Electrical System Testing: Periodically check GFCI outlets and main panel connections to ensure stable power delivery.
Joining a structured membership program provides routine inspections across your heating, cooling, electrical, and plumbing infrastructure, preventing costly breakdowns.
Making the Right Choice for Your Remodel
Successfully heating and cooling a finished basement or home addition requires balancing climate equipment, electrical capacity, air quality, and plumbing design. Addressing these systems during the planning phase ensures your new space remains comfortable, safe, and energy-efficient year-round.
When expanding your living footprint, partner with licensed tradespeople who can manage all connected mechanical elements seamlessly. Explore professional HVAC, electrical, and plumbing services to build a safe, efficient, and comfortable climate plan for your next home improvement project.