

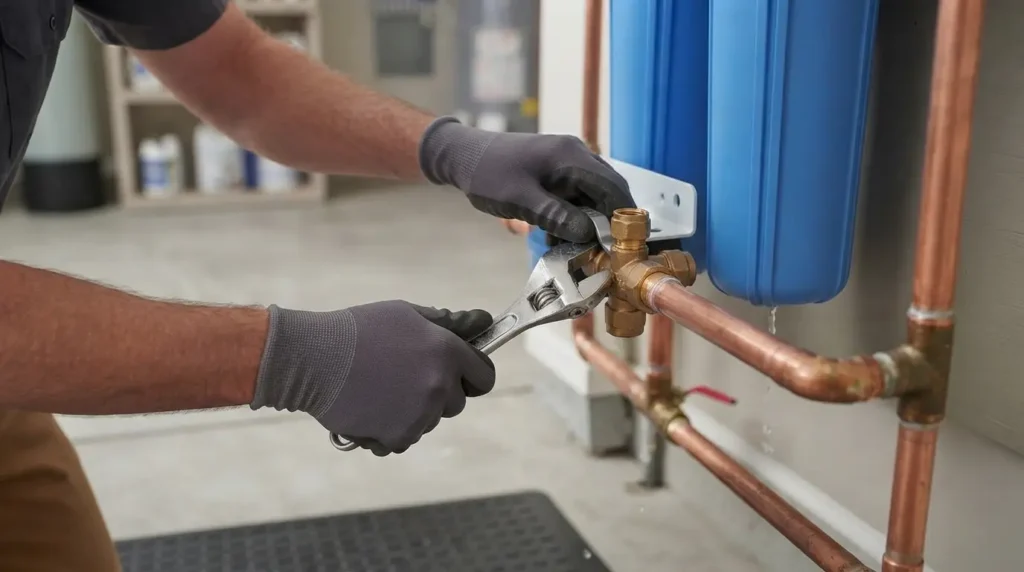
Investing in a whole-home water filter installation is one of the most effective steps you can take to upgrade your household’s health, protect your plumbing infrastructure, and improve your daily quality of life. Whether you are dealing with municipal chlorine, heavy sediment from a local supply, or harsh mineral scaling on your fixtures, bringing in a licensed contractor guarantees that clean, purified water flows from every single tap in your house. While the decision to upgrade your water quality is exciting, many homeowners feel uncertain about what actually happens on installation day. Understanding the exact mechanical steps, site requirements, and timeline allows you to prepare your property efficiently and ensures your contractor can work seamlessly to complete the project without unexpected delays or costly surprises.
1. Initial Assessment and Pre-Installation Planning
Before a single pipe is cut or a single filtration media tank is anchored, a professional installation begins with a rigorous technical assessment of your home’s existing plumbing infrastructure. This initial evaluation ensures that the chosen system aligns perfectly with your physical layout and water usage demands.
Water Quality Testing and System Sizing
No two homes have identical water chemistry. A professional contractor begins by reviewing a comprehensive water test to measure total dissolved solids (TDS), chlorine levels, iron content, hardness minerals, and pH balance. Based on these findings, the team verifies that your selected whole-home system features the correct filtration media—such as catalytic carbon, KDF, or specialized sediment pre-filters—to tackle your precise contaminants.
In addition to chemistry, flow rate (measured in gallons per minute or GPM) must be calculated. A system sized too small will restrict water pressure across upper-floor showers and laundry appliances, while an oversized system wastes money and space.
Choosing the Physical Location
Whole-home filtration systems are point-of-entry (POE) applications, meaning they must be positioned directly inline with your main water shutoff valve before the supply splits into hot and cold lines. Standard installation sites include:
- Basements or Utility Closets: Ideal for protection against freezing temperatures, offering easy access for routing bypass lines and routine maintenance.
- Garages: Common in warmer climates, provided there is adequate clearance and protection from extreme weather elements.
- Mechanical Rooms: Placed alongside water heaters and HVAC units for centralized home utility management.
Pre-Install Site Preparation Checklist
To ensure installation day proceeds smoothly, homeowners should handle a few minor preparatory tasks:
- Clear a 5×5 foot radius around your main water supply pipe and shutoff valve.
- Ensure a dedicated, grounded electrical outlet (110V) is within reach if your unit uses an digital control valve or UV disinfectant lamp.
- Verify that a suitable drain line (such as a floor drain, standpipe, or sump pit) is accessible for backwashing filter models.
2. On-Site Preparation and Plumbing Diagnostics
On the day of your installation, the professional crew arrives with specialized equipment, copper or PEX piping, shutoff valves, and high-grade mounting hardware. Before starting physical work, the lead technician conducts a pre-flight walkthrough of your utility space.
       [Main Municipal / Well Supply]
                     │
         [Main Shutoff Valve]
                     │
    ┌────────────────┴────────────────┐
    │     [3-Valve Bypass System]     │
    │  ┌───────────[ON]───────────┐   │
    │  │                          │   │
    └──┼────────────┐  ┌──────────┼───┘
       │            │  │          │
    [Valve A]   [Filter Unit]  [Valve B]
       │            │  │          │
       └────────────┼──┼──────────┘
                    │  │
            [Filtered Water Out]
                    │
         [To Water Heater & Taps]
Pressure Testing and Flow Checks
High municipal water pressure can damage delicate filter housings and void manufacturer warranties. Technicians install a pressure gauge on your existing line to confirm incoming static pressure falls within safe parameters (typically 40 to 60 PSI). If your water pressure exceeds 80 PSI, a pressure-reducing valve (PRV) will be recommended and integrated prior to the filtration unit.
Shutting Down and Draining the Plumbing Lines
Once diagnostics are complete, the contractor shuts off the main water valve to isolate the home. They then open low-tier fixtures—such as basement utility sinks or outdoor hose bibbs—to drain lingering static water and relieve internal pipe pressure. This prevents messy water spills when cutting into your primary copper or PEX mains.
If you notice existing issues like low hot water pressure, your technician will evaluate whether internal pipe corrosion or sediment buildup inside your water heater needs addressing alongside the new installation.
3. The Mechanical Installation Process
The mechanical installation represents the core of the project. A certified technician utilizes precision tools to cut into your main line, build out custom plumbing configurations, and install code-compliant bypass systems.
Installing the Three-Valve Bypass Loop
A vital component of any professional filtration setup is the three-valve bypass assembly. This configuration allows you to divert water around the filter unit whenever you need to perform cartridge swaps, complete system flushes, or deliver raw unfiltered water to outdoor irrigation systems.
Normal Operation:  Main Water ──► [Filter Unit] ──► Clean Home Supply
Bypass Mode:       Main Water ──► [Bypass Valve] ──► Direct Home Supply (Maintenance Mode)
By installing ball valves before, after, and above the unit, your contractor ensures that routine filter maintenance never forces you to shut off water to the entire house.
Mounting and Setting Up Media Tanks
Heavy media tanks and multi-stage filter housings are leveled, anchored securely to the floor or wall studs, and connected to the newly fabricated plumbing loop. Technicians pay close attention to material compatibility:
- Copper Piping: Joined using high-temperature sweat-soldering or heavy-duty press-fit fittings.
- PEX Piping: Secured with stainless steel cinch rings or expansion collars to absorb vibration and prevent stress fractures.
- Dielectric Unions: Used whenever dissimilar metals (such as copper meeting galvanized steel) intersect, preventing galvanic corrosion over time.
Electrical and Drain Line Integration
If your whole-home filter utilizes automatic backwashing or electronic control valves, the technician runs a dedicated drain line with a physical air gap to prevent back-siphonage of waste into your clean water supply. Any electrical connections are neatly organized, grounded, and verified for surge safety.
4. System Flushing, Pressure Testing, and Calibration
With the physical plumbing complete, your installer does not simply turn the water back on and leave. The post-assembly phase requires methodical flushing and calibration to protect your home’s internal fixtures from loose manufacturing debris or carbon fines.
Flushing Carbon Fines and Media
New carbon filter tanks contain microscopic dust created during manufacturing and shipping. To clear this material:
- The technician keeps the home’s internal isolation valve closed.
- The main water supply is slowly re-opened to fill the filter vessel gradually, purging trapped air out of a dedicated drain or purge valve.
- The filter is flushed continuously for 10 to 20 minutes until the discharge water runs 100% crystal clear.
Skipping this step would allow carbon dust to flow directly into your home, clogging sink aerators, toilet fill valves, and washing machine inlet screens.
Pressure Drop and Leak Audits
After flushing, the technician pressurizes the entire household network and inspects every joint, sweat-connection, and threaded connection using high-intensity flashlights and dry towels. They monitor line pressure for 15 to 30 minutes to verify zero pressure drops across the whole-home network.
Post-Installation Water Testing
To confirm the filtration media is actively working, a secondary water test is performed at a downstream faucet. The contractor checks for immediate drops in free chlorine, clarity improvements, and stable pH levels, guaranteeing your system delivers pure water from day one.
5. Homeowner Handover and Long-Term Maintenance
A professional installation concludes with a detailed walk-through. Your contractor walks you through the utility space, explains how the mechanical components operate, and outlines your ongoing maintenance responsibilities.
Understanding Your System’s Operation
During the final walk-through, your technician will physically demonstrate:
- Operating the Bypass Loop: How to turn off the filter isolated valves and open the center bypass valve during emergency maintenance.
- Reading Control Panels: How to interpret digital screen displays, view current GPM usage, and track manual backwash schedules (for electronic systems).
- Shutoff Procedures: Exactly what to do if you ever suspect a leak or need to isolate the system during long vacations.
Routine Maintenance Requirements
To keep your water quality pristine and preserve your plumbing equipment, regular maintenance is essential:
- Sediment Pre-Filters: Inspected visually every month and replaced every 3 to 6 months depending on local sediment load.
- Main Filter Media / Cartridges: Replaced or re-bedded every 1 to 3 years depending on grain hardness, total gallon throughput, and media type.
- UV Lamps (If Applicable): Annual bulb replacements to maintain proper germicidal dosage for biological disinfection.
Maintaining clean water systems works in tandem with managing overall home comfort and environment. For instance, keeping utility zones dry prevents corrosion on control valves, while managing overall indoor air quality ensures your basement spaces remain sterile and free from mold.
Why Professional Installation Outperforms DIY Efforts
While handy homeowners may feel tempted to purchase big-box filtration units and attempt a weekend installation, whole-home water treatment involves high-stakes plumbing. Rerouting your main line incorrectly can create severe hydraulic bottlenecks, void manufacturer warranties, or cause catastrophic basement flooding.
Professional Installation           DIY / Unlicensed Install
─────────────────────────           ────────────────────────
✓ Code-compliant 3-valve bypass     ✗ Single direct-pipe cut (no bypass)
✓ Sized for household peak GPM      ✗ Undersized units cause pressure drops
✓ Dielectric isolation prevents rust ✗ Galvanic corrosion from mixed metals
✓ Flushed carbon dust safely        ✗ Carbon fines clog home fixtures
✓ Full labor & parts warranty       ✗ Voided equipment warranty
Licensed contractors bring specialised pipe-fitting tools, backflow prevention knowledge, and local plumbing code compliance to every job site. Hiring an expert guarantees that your system delivers optimal flow performance without compromising the integrity of your home’s water pressure or structural safety.
How Whole-Home Water Filtration Protects Other Household Equipment
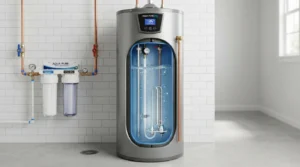
Installing a whole-home filter benefits far more than just your drinking glass. Unfiltered municipal or well water carries abrasive sediment, harsh chlorine, and dissolved minerals that degrade domestic appliances from the inside out.
Protecting Heating and Water Heater Systems
Sediment and scale buildup are primary drivers of premature water heater failure. When hard minerals and debris settle at the bottom of a water heater tank, they form an insulating layer over heat exchangers, causing the unit to work harder, consume excess energy, and crack prematurely. Removing these elements at your main line preserves heating efficiency and extends the operational life of boilers, tankless heaters, and standard storage units.
If you ever notice water quality dropping alongside heating irregularities—such as rusty or discolored hot water—it is often a sign that sediment has already settled inside your tank and requires a professional flush.
Safeguarding Air Conditioning and Humidity Controls
Central mechanical rooms often house both plumbing entry points and climate control equipment like hydronic coils or whole-home humidifiers. Mineral-heavy water fed into steam humidifiers creates scale crusts that burn out heating elements and block distribution pads. Clean, filtered supply water ensures these secondary systems run reliably throughout the year.
If you suspect your home’s mechanical systems need attention—whether performing seasonal air conditioning maintenance or resolving airflow strains caused by dirty furnace filters—working with a trusted contractor ensures every utility system runs at peak performance.
Frequently Asked Questions About Whole-Home Water Filter Installation
How long does a whole-home water filter installation take?
Most standard whole-home water filter installations take between 3 and 5 hours to complete. Complex setups involving UV sanitizers, water softeners, or extensive copper rerouting may take 6 to 8 hours.
Will my water be turned off during the entire installation?
No. Your contractor will only turn off the main water supply while cutting into the line and installing the main bypass valves—typically for 1 to 2 hours. Once the bypass loop is built, water can be turned back on to the home while the technician mounts and tests the filtration tanks.
Does a whole-home filter lower my water pressure?
A correctly sized system installed by a licensed professional will cause virtually no noticeable drop in water pressure (typically less than 1 to 2 PSI). Pressure drops only occur if a system is undersized for your home’s peak flow rate or if sediment pre-filters are left uncleaned for extended periods.
What is the difference between a whole-home filter and an under-sink reverse osmosis system?
A whole-home system (Point-of-Entry) filters 100% of the water entering your property, protecting your pipes, showers, and appliances from sediment and chemicals like chlorine. An under-sink system (Point-of-Use) targets a single kitchen tap to remove microscopic contaminants, heavy metals, and dissolved solids for ultra-pure drinking water. Many homeowners choose to combine both for comprehensive protection.
Ready to Upgrade Your Home’s Water Quality?
A professional whole-home water filter installation provides peace of mind, healthier skin, better-tasting water, and long-term protection for your plumbing and heating equipment. By choosing an experienced contractor to evaluate your water profile, design a code-compliant installation, and perform precise system calibration, you can enjoy clean, pure water from every tap in your house for years to come.
If you are ready to evaluate your water quality or schedule a whole-home system installation, contact your local plumbing and HVAC professionals today to get started!